One of the problems with the iOS and macOS environment is doing data backups without losing any information from any of your iOS device. iTunes was a great option until now but with macOS Catalina on the horizon, iTunes is being deprecated on macOS Catalina 10.15 and you'll be wondering how to sync your iPhone with macOS Catalina after your upgrade. Don't worry, you are not left high and dry. There are several ways to backup data from iPhone to Mac desktop after an OS upgrade on the latter. Here are a couple of them.
If you've already upgraded your Mac to the latest macOS Catalina, you'll know that the old way of syncing via iTunes is no longer available. Apple has essentially split the app into three components: one for music, one for TV and one for podcasts. However, they've moved some of the functionality of iTunes into the Finder app. Here's what to do:
Step 1: Hook up your iPhone to your Mac running macOS Catalina.
Step 2: Launch a new Finder window and look under the Locations menu item to see your device.
Step 3: Clicking on your device name will bring up a main window pane containing some of the familiar elements from iTunes.
Step 4: You'll see a 'Sync' button on the bottom right, which you can click on to sync all your file data.
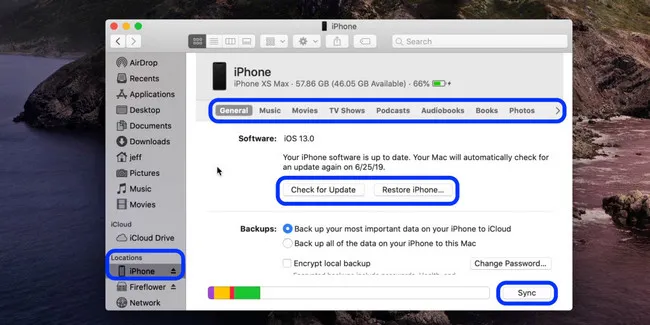
Although Apple kept the sync functionality and moved it to Finder, it's not always the ideal way to backup data from iPhone to a Mac, especially one that's running the latest Catalina OS. For that reason, you might also consider other tools like iPhone Transfer.
As you can see from the above screenshot, only a few items will be synced to Mac. Other items like contacts, messages are not available. So you might need to find other apps to do this like iPhone Transfer, which is essentially a purpose-built data transfer application for macOS environments. No more depending on iTunes or Finder to sync or move data between your device and your computer. It handles more than a dozen types of data, and there are options to transfer files from computer to device or vice versa, and even sync from your device directly to the iTunes service in case you're running an older version of macOS.
iPhone Transfer offers an intuitive interface and a set of simple steps to accomplish your goal. It is also packed with a lot of other useful tools such as HEIC to JPG converter, using songs as ringtones, backing up contacts on a regular basis, and much more. For data transfer, it is one of the fastest and more versatile applications you'll find. Here's how the one-click transfer method works:
Step 1: After you install the program, on launching you'll find a menu item called Toolbox in the left sidebar panel.
Step 2: Connect your iPhone to the Mac. Inside the Toolbox, you'll see a "Device to PC" option. Click it.
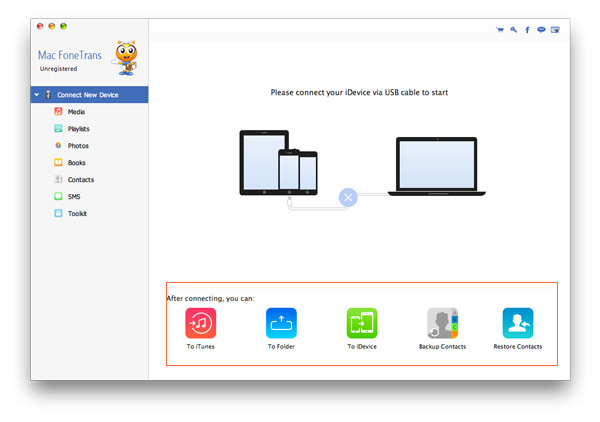
Step 3: Now you'll see a different window in the center panel. The source device (your iPhone) will be on the left and the Mac will show up on the right. In the middle, you'll find all the data types that can be transferred. Leave them checked or uncheck the ones you don't need.
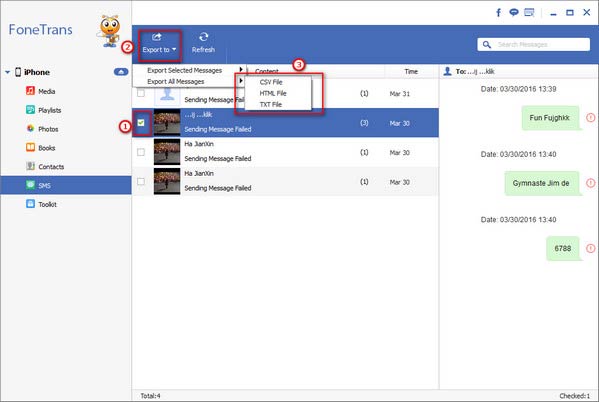
Step 4: Hit Start and your data will be transferred in a little while.
Whether you use the Finder method or decide to use a third-party tool, your first consideration should be the security and integrity of your data. iPhone Transfer does not touch any of the data except when you choose to convert HEIC images to another format. Everything else will be transferred into a backup file that you can download to your Mac or PC to keep your information safe.