Starting with iOS 11, your iPhone photos are saved as HEIC format instead of the widely-used JPG format. The main benefit of HEIC images lies in their smaller sizes when compared to the traditional JPG photos. The adoption of HEIC format gives users more storage space on their iPhone, iPad, and Mac.
However, it has drawbacks too. One such drawback is that HEIC format is not supported in most of the photo apps and services out there, meaning that you need to convert it to a more common format. With that in mind, we are going to show you how to convert HEIC photos to JPG on your iPhone.
On a modern macOS version (macOS High Sierra or later), Apple built a cool tool called Preview directly into its operating system that allows you to view any image format type. However, the Preview app is not just about a photo viewer as it also lets you convert HEIC photos to JPEG. The process is pretty simple and you can follow our guide below.
Step 1: Open Finder on your Mac, then head to the folder that contains HEIC photos you wish to convert to JPEG and select one.
Step 2: Perform a right-click on that HEIC photo, then select Open With, and select Preview (Default) from the list of options.
Step 3: Your photo will open in the Preview app. From here, you should see a list of all your HEIC photos stored on your Mac. If you want to convert all of them to JPG, then click on Edit at the top and click "Select All".
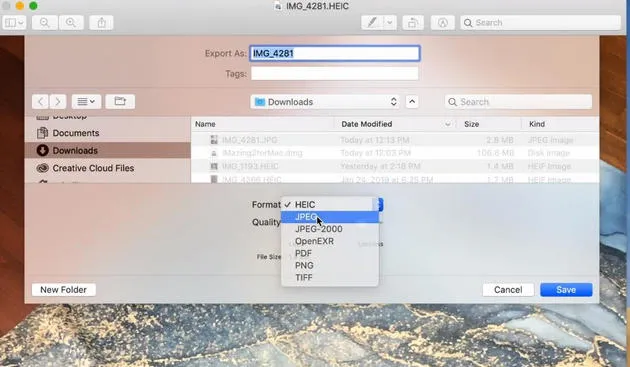
Step 4: Now, click on File at the top, then select Export Selected Images, and select JPEG format from the Format section.
Preview is a great for single file conversaion and there is no batch mode available. If you had hundreds of photos to be converted. then third-party HEIC Converter is more preferred in such a case, which saves a lot of time for file conversion. iPhoneTransferRecovery is one of the most reliable HEIC converters on Mac and Windows. With Aiseesoft, you can quickly convert any HEIC images to JPG or PNG at no cost. All you need to do is to download the tool from here and then let it do the work.
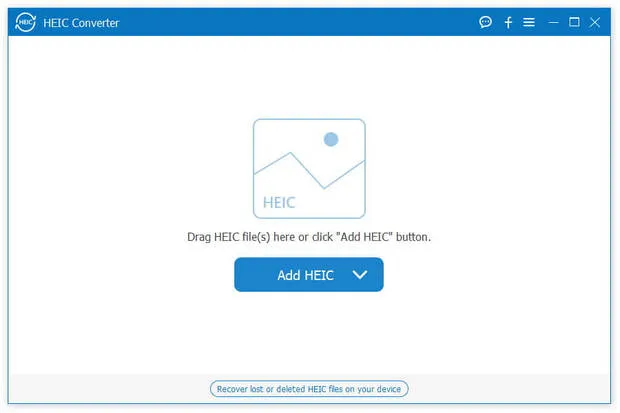
Step 1: Once you have the tool installed on your Mac, then run it and click on the Add HEIC option from the main interface.
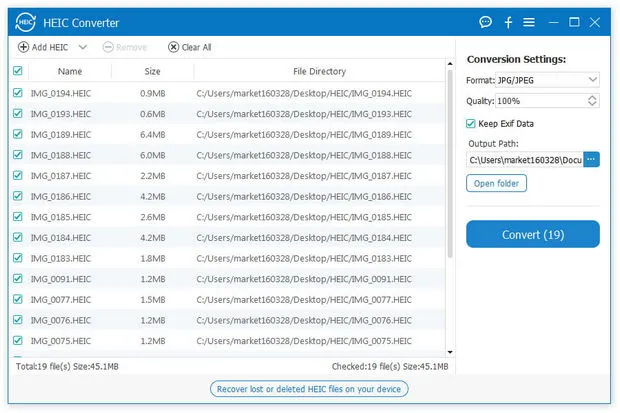
Step 2: From here, select the output format for your HEIC photo (JPEG) and output path, and then proceed with clicking on the Convert button. You can convert multiple HEIC files to JPEG at the same time.
Step 3: When it is done, click Open Folder and you should see your photo there.
The third-option is looking for online service for image conversion. There are tons of online HEIC-JPG converters out there, but keep in mind that some of them are scams. With that in mind, we recommend you opt for Heictojpg.com, one of the best free online HEIC-JPG converters. At Heictojpg.com, they convert all of your HEIC photos to JPG without losing the quality.
Step 1: Open your web browser on your Mac and then visit Heictojpg.com
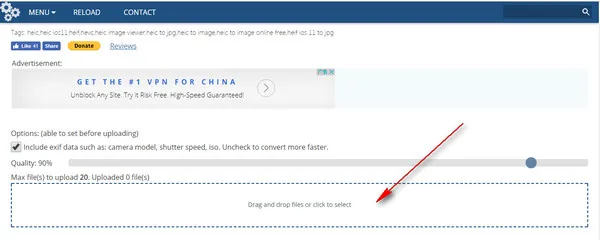
Step 2: Once you are in, click on the Plus button and select the HEIC file you wish to convert to JPG.
Step 3: Now, select the folder for your photo, and hit the Convert button.
The Terminal app has been a big part of macOS for years, allowing you to control your Mac. This is similar to Command Prompt on Windows. One of the most obvious benefits of macOS Terminal is that it is quick. Indeed, with a simple command line, you can quickly launch apps and services on your Mac.
You can also use the Terminal to change HEIC images to JPG. However, the process is a little confusing, so make sure you follow our guide below.
Step 1: You need to install Homebrew, one of the leading package managers for Mac. To do this, open your macOS Terminal prompt and enter the following command:
/usr/bin/ruby -e "$(curl -fsSL https://raw.githubusercontent.com/Homebrew/install/master/install)"
Step 2 :Install ImageMagick by using the following command: brew install --with-libheif imagemagick
Step 3: Now, you can convert HEIC image to JPG. To do this, enter this command: mogrify -format jpg *.heic.
Make sure to use the right file name to replace * in above command.
Conclusion: Converting HEIC to JPG on Mac has become much easier than before. However, the process seems a little bit confusing to some users. If you are looking for the best ways to convert HEIC to JPG on your Mac, then you have come to the right place.