iPhone is one of the best phones for taking photos you can buy right now, but in reality, a lot of people are now opting for DSLRs for professional shootings. That makes sense as DSLRs offer more power and faster lens, which allows you to catch all of your action in a blink of an eye.
When taking photos with your professional cameras out there, images are usually saved directly to your device. If you want to import the photos taken with camera in your iPhone's Camera Roll, then you need to transfer them to iPhone directly or indirectly.
One of the most used methods to move photos to iPhone is backing them up in your computer and then copying them to your iPhone. However, that's not the only option as there are a few more of them out there. In this guide, we are going to walk you through the steps on how to import your photos from your Digital camera to iPhone.
One common way to transfer your photos from digital camera to iPhone is using a Lightning to SD or USB camera adapter ($29). However, you are also going to need a USB cable to connect your camera to that adapter. Following this method, you can quickly transfer your photos from any external device to your iPhone.

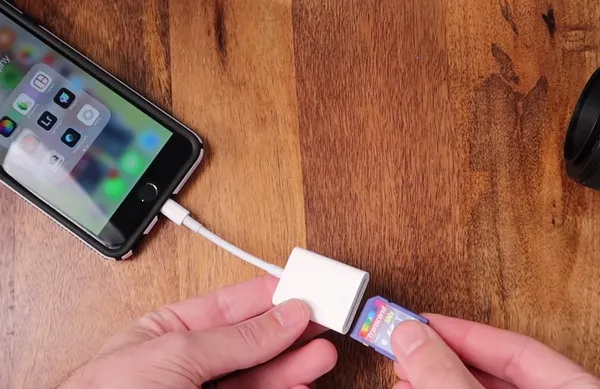
Step 1: Plug a USB cable into your digital camera and connect it to the USB camera adapter.
Step 2: Plug the USB adapter into the Lightning port on your iPhone and then open the Photos app on your iOS device.
Step 3: Now just hit the Import button to start transferring your photos to iPhone. The process may take several minutes depending on how many photos you are transferring.
Note that: This method won't work if you try moving your iPhone photos to your digital camera.
Alternatively, you can use a Lightning to SD camera adapter. In this case, just simply remove the SD card from your camera, then plug it into the adapter, and connect the adapter to the lightning port on your iPhone.
If you are looking for a third-party tool that lets you transfer photos from digital camera to iPhone, then give iPhone Transfer a try. In reality, iPhone Transfer serves as an ideal iTunes replacement, but it is faster and smarter than Apple's management software.
However, iPhone Transfer does not include support for transferring photos directly to iPhone from a digital camera. You are going to need to move your photos to your computer before moving ahead.
To do this, connect your camera to a PC or Mac using the USB cable and create a new folder on local hard drive. Then copy all camera photos to the target folder.
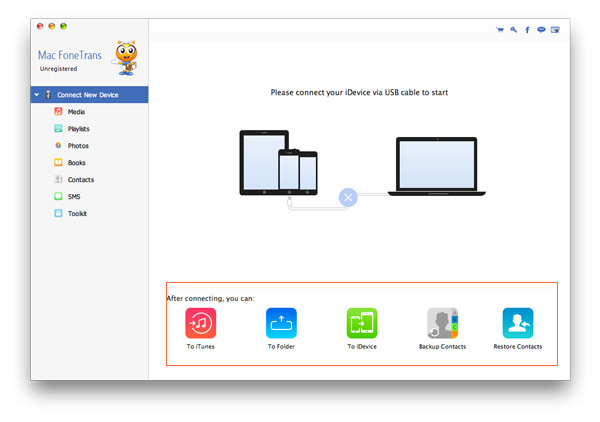
Download and install the tool by clicking the above button. Run the tool on your computer and then connect your iPhone to your computer using the Lightning cable.
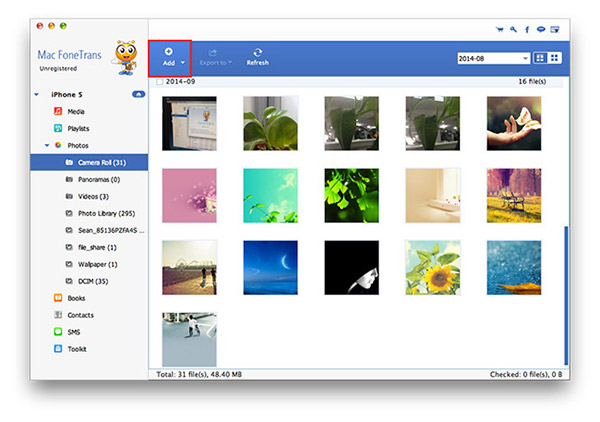
Select the Photos icon from the left-side bar when your iPhone shows up. Now just simply click the Add button, then select all of your photos you wish to move to iPhone, and hit the Open button.
If you don't want to use any type of cables and adapters, then try a cloud service. In realty, there are tons of cloud services out there that store your photos and files, like Dropbox, OneDrive, or Apple's iCloud service. However, you are going to need to spend some cash if you want to some extra storage space.

There is no direct way to move photos from camera to iPhone using a cloud service as you need to get the photos from your digital camera to the cloud beforehand. Once you are done, install the storage service app on your iPhone and then download your photos from cloud to iPhone.
AnyTrans is a reliable tool that lets you transfer your photos from your digital camera to iPhone. One of the best highlights of AnyTrans is its intuitive user interface and useful features. However, it has one major drawback that prevents it from getting the perfect score. One such drawback is that your antivirus programs may block AnyTrans from being launched on your computer, so we recommend you disable any kind of antivirus software before moving ahead.
Note that you are going to need to move your photos from camera to computer first and then transfer them to iPhone using AnyTrans.
Step 1: You need to download and install AnyTrans first.
Step 2: Once you are done, connect iPhone to your computer and launch the app.
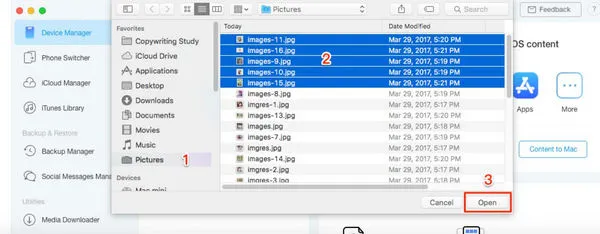
Step 3: Click Device Manager on the left sidebar and select Photos. Now click the "+" button, then a file dialog box pops up. Choose the photos you want to import and click Open button to transfer them into iPhone.
If you are looking for a way to move photos from digital camera to iPhone, then you have come to the right place. We hope that this guide helps you decide which one is the best for you. Feel free to share with us if this guide works for you.