iTunes is a great utility that allows you to keep your iPhone up to date and keep track of all your media in one place. It's also a space-saver that can be used to backup your iPhone's data for when you need to restore the device to a former state. However, iTunes comes with a lot of problems, and not all of them are software bugs.
One of the most basic problems faced by iDevice users is the "iTunes could not connect to iPhone" error message, including:
1. itunes could not connect to this iphone. The value is missing
2. itunes could not connect to this iphone 0xe8000015
3. itunes could not connect to this iphone because an error occurred while reading
4. itunes could not connect to this iphone. could not send a message to the device
5. itunes could not connect to this iphone an unknown error occurred
It's frustrating, to say the least. Apple recommends several steps to deal with the problem, but it inevitably ends with contacting Apple Support for help. What if you don't want to do that? Wouldn't it be great if there were a simply tool that can resolve the issue without the need to contact Apple? Fortunately, there is. However, let's first show you what Apple recommends you do before anything else.
Apple suggests several things you can try to make the "iTunes count not connect to iPhone" error go away.
1. Make sure iTunes is updated to the latest available version
2. Check if your device is turned on
3. Check the "Trust This Computer" option if you get the alert to do so
4. Unplug all other USB devices and try every USB port to see if the problem goes away
5. Restart the device and see if that works
6. Try another computer to see if that's what is causing the problem
As you can see, it's not very convenient to go through all these steps every time you encounter this error. Fortunately, there is another way.
Experts also recommend that you either restart or reinstall iTunes on your computer to get rid of this pesky problem. For restarting, you will need to delete all the file folders that you find in the following drive path: /var/mobile/Media/iTunes_Control
Once you've deleted those folders, you can restart iTunes and the problem should have gone by now.
Once you've uninstalled the above applications, reinstall iTunes from the official Apple site. By now, the problem with either have been resolved, or the hair on your head has turned grey and you've aged by 20 years! To avoid such a situation, read on.
Unless the problem is hardware-related, almost any iTunes error can be fixed by iTunes Repair. This premium software fixes over 100 such errors, and even those that cannot be identified. The best part is that there is zero data loss when you execute the fix. Moreover, you can even use it to clean up your iTunes and boost your computer's performance.
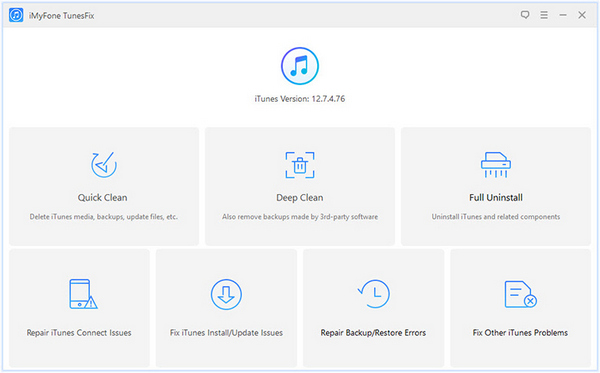
The software boasts an auto-detect and one-click fix solution to any iTunes problem, which is why it's well worth the money you invest for a lifetime license. To use this powerful application, follow the method described below:
First of all, download and install iTunes Repair on your Windows 10 computer. The software also supports Windows 8 and Windows 7.
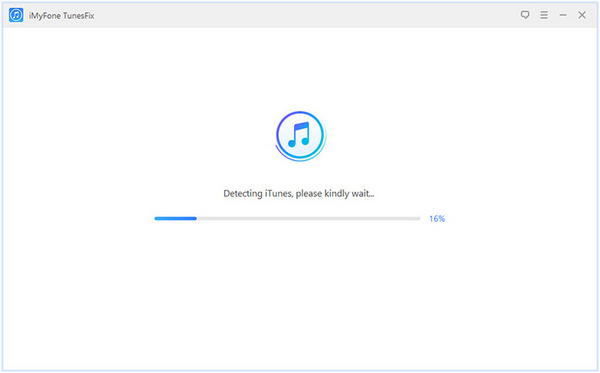
Now, launch the software on your PC. If your iTunes is missing any components or there's any corrupted information, you'll be shown a list of components and which of them needs fixing. The "Repair" button will help resolve whatever issues are plaguing your iTunes.
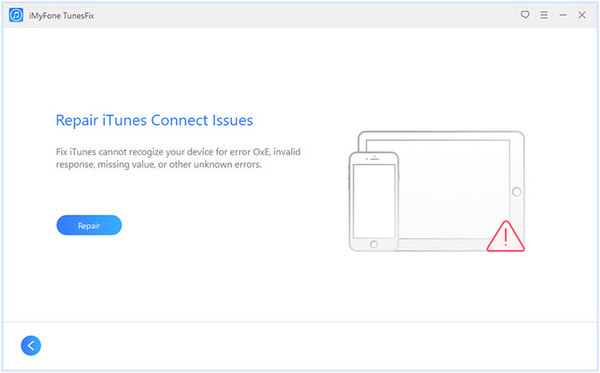
Once this process is complete, go back to the home screen of the software. Here, you'll see various types of fixes. The one you need is "Repair iTunes Connect Issues"; click on it, then click on "Repair".
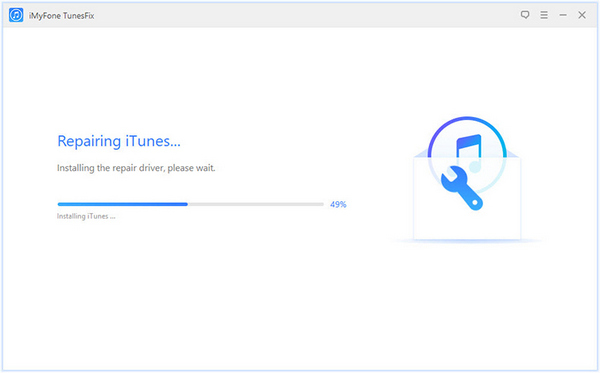
At this point, iTunes Repair will automatically download the correct repair driver to fix your iTunes. Once complete, restart your machine and try to connect your device again with iTunes open. The problem will be resolved.
The biggest advantage of using this software is that you don't need to manually identify or select the type of problem you need to fix. You just need to know what category the issue falls under. Once you select the right module, the rest of the heavy lifting is done for you by the software.